Most microfiber buying decisions focus on the middle of the cloth — the GSM, the fiber blend, the surface finish. But the part that most often determines whether a cloth looks sharp on day one and still works on day fifty is the perimeter. The edge decides whether the cloth frays, whether it can safely touch a lens or a coated screen, whether a printed design can run all the way to the border, and a surprising share of the unit cost. It is a real construction choice, separate from the pile and the weight, and it deserves its own decision.
The edge does more work than it looks
A raw-cut microfiber edge left untreated will shed fibers and unravel in the wash, so every finished cloth resolves the edge one of two ways: it either stitches the border closed with thread or fabric, or it seals the cut itself with heat. That single fork drives most of the trade-offs that follow. Stitched edges tend to be tougher and cheaper but add material at the border; sealed edges are cleaner and gentler but rely on the seal holding up. Knowing which family a cloth belongs to tells you most of what you need before you read another spec.
Stitched edges: overlock and piping
Overlock, or serged, is the workhorse: polyester thread sewn around the border hundreds of times to lock the fibers in place. It is the most common and most economical finish, and it resists fraying extremely well, which is why general-purpose cleaning cloths almost always wear it. The catch is that the raised thread border is harder than the microfiber around it, so a serged edge can leave micro-scratches on truly delicate surfaces like camera lenses, eyeglasses, or freshly coated automotive paint. For a rag that wipes counters and equipment, that is a non-issue; for a cloth that touches optics, it matters.
Piped or banded edges wrap a thin strip of fabric around the border and sew it in. The band seals the edge against fraying and can look more finished, and how gentle it is depends entirely on the trim material: a soft microfiber band is kinder to surfaces than a stiffer polyester satin one. The trade-off is that the cloth’s absorbency is slightly interrupted where the band sits, so the very edge does less cleaning work than the field of the cloth.
Cut edges: laser, heat, and ultrasonic
Sealed edges skip thread entirely. A laser or heat cut melts the polyester as it cuts, fusing the border so it cannot unravel, and because there is no stitching and no added material, the cloth has a clean, flush perimeter that is gentle on fine finishes and lets a printed design bleed all the way to the edge. Ultrasonic cutting takes the same idea further, using a blade vibrating at high frequency that seals with minimal heat and holds a very tight dimensional tolerance. Detailers and optical suppliers tend to prefer these edgeless cloths precisely because there is no border material to drag across a sensitive surface.
The honest limitation of cut edges is longevity under abuse. A sealed border is thinner than a serged one, and on higher-GSM cloths that get worked hard the seal can eventually start to separate at a corner. A hidden or two-ply edge answers that by tucking the border inside a doubled construction, combining the scratch-safety of an edgeless cloth with more of a stitched edge’s durability — at the cost of a heavier, pricier cloth.
Why cut consistency matters for printed cloths
If you are ordering custom-printed cloths, the cutting method affects more than fraying — it affects whether every piece in the run finishes at the same size. Sealed cutting is far more precise than cutting by hand, and that precision is what keeps a full-bleed design registered to the same border on every cloth instead of drifting a few millimeters piece to piece.
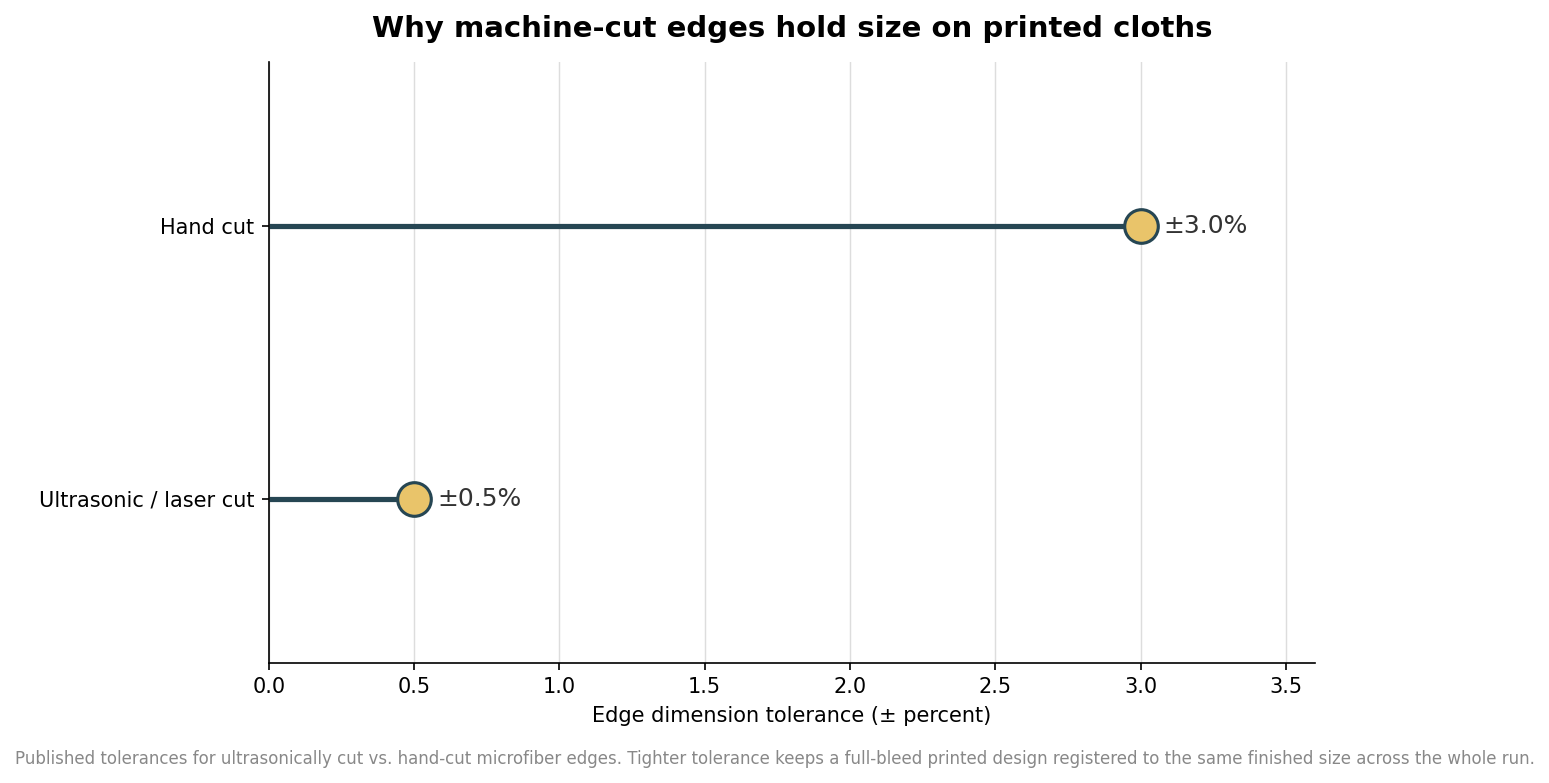
That difference is easy to overlook on a single sample and obvious across a few thousand units. When the artwork runs edge to edge, a loose tolerance shows up as uneven margins and clipped logos; a tight one keeps the print sitting exactly where the proof promised. For lens cloths and promotional cloths where the graphic is the product, machine-sealed edges are usually the right call for that reason alone.
Matching the edge to the cloth’s job
Put the finishes side by side against the two things that matter most for your use: how much fraying abuse the cloth will take, and whether it has to be gentle on a delicate surface. The comparison below summarizes where each finish lands.
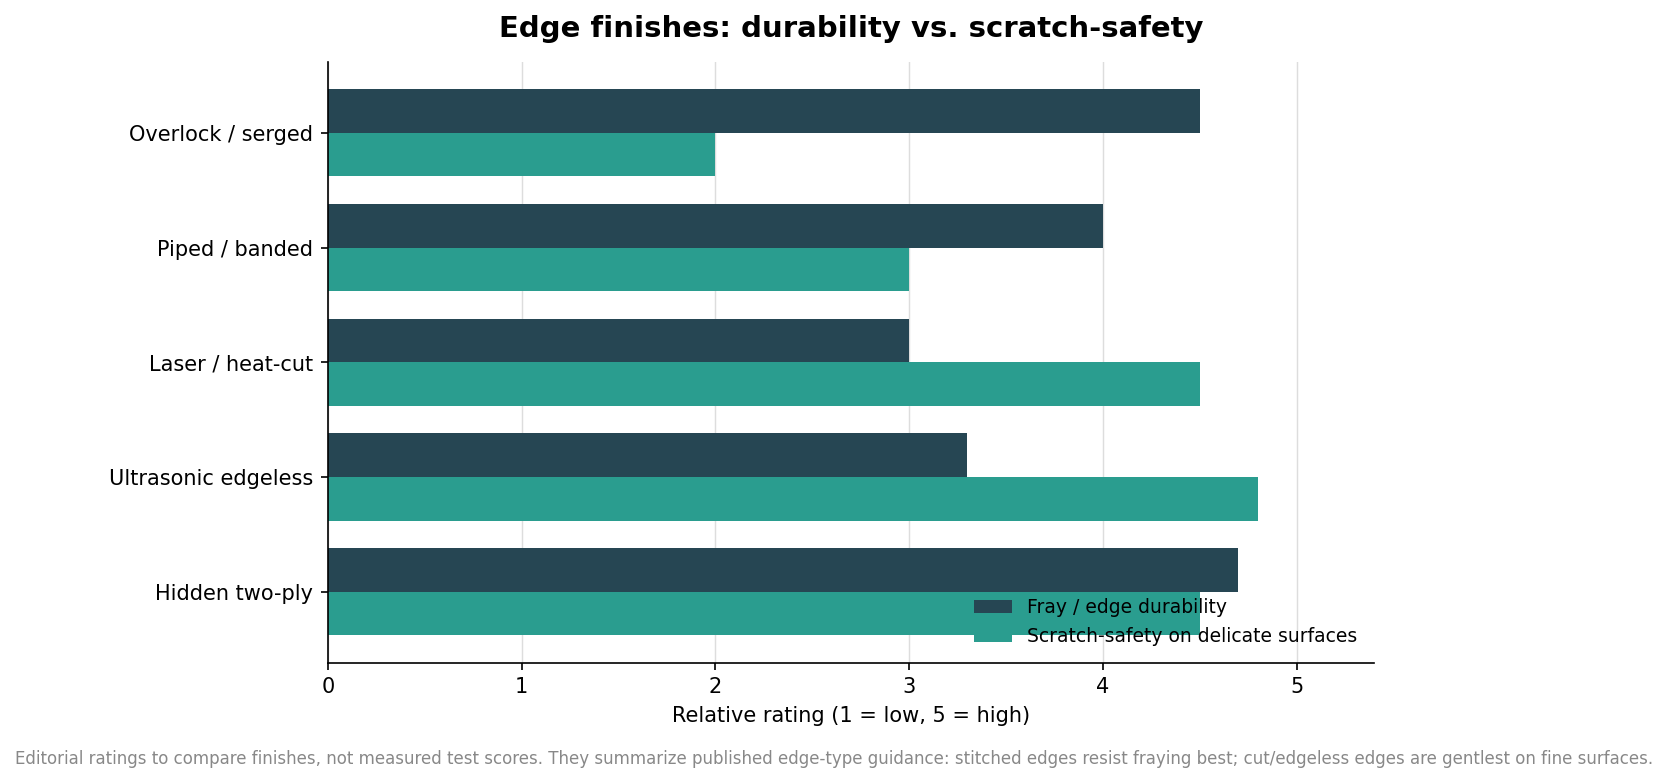
The pattern is consistent. If the cloth is a durable cleaning tool that will be laundered hard, a serged edge gives the most fray resistance for the least money. If it will touch lenses, screens, or fine paint, an edgeless laser or ultrasonic edge removes the border that would otherwise scratch. If you need both toughness and surface-safety, a hidden two-ply edge splits the difference. And if the cloth is a printed giveaway where the design runs to the border, the clean, tightly cut edge is what makes the graphic look intentional.
Whichever edge you choose, confirm it on a real production sample and put it through several wash cycles before committing, since fraying and seal separation only show up after laundering, not on the first wipe. Match the edge to the job the way you already match GSM and fiber, and the cloth will still look and work the way you intended long after the first box is opened.